


Body + Mind is reader-supported. We may earn an affiliate commission when you buy through some of the links on our site.
Making your own cooking oil sounds like the sort of project that requires a farm, a huge machine and a suspicious amount of patience. However, you can actually press oil at home with relatively simple equipment, though it does take some work. Here’s how to make vegetable oil at home.
Vegetable oil is a plant-based fat that is liquid at 20° Celsius. Despite the name, it doesn’t necessarily come from vegetables like carrots or spinach. Instead, vegetable oils are commonly extracted from seeds, nuts and fruits using mechanical pressing, solvents or a combination of methods.
Among the most familiar examples are canola, soybean, corn and sunflower oils. Many remain liquid at room temperature and have a relatively mild flavor, which makes them useful for everything from marinades and mayonnaise to baking and salad dressings.
The oil you buy at the supermarket may have gone through considerable processing before it reaches your kitchen. Some oils are refined, bleached and deodorized to give them a more consistent color, taste and stability. Refining can involve neutralizing fatty acids, removing phospholipids and filtering the oil, along with other treatments designed to make the finished product more stable for storage and further processing.
Cold-pressed oils take a different route. Instead of using chemical solvents for extraction, you can mechanically press the plant material to release its oil. That’s essentially what you’ll be doing when you make your own vegetable oil at home.

It can be, but homemade doesn’t automatically mean healthier. What’s more important is which plant the oil comes from, its fat composition and how you use it in your diet. Vegetable oil is primarily fat, so it doesn’t provide the fiber, vitamins and minerals associated with eating whole vegetables. However, some plant oils contain substantial amounts of monounsaturated or polyunsaturated fats.
Research suggests that replacing saturated fats with oils rich in these unsaturated fats, including canola, olive and soybean oils, can help improve blood lipid profiles, including total and LDL cholesterol.
Polyunsaturated fats include omega-3 and omega-6 fatty acids, which your body can’t produce in sufficient amounts on its own. Soybean, corn and sunflower oils, for example, are particularly rich in omega-6 fatty acids. These can support your health in various ways, such as thickening your hair and helping with hair loss.
The process is fairly simple, but there are a few things you need to get right to produce a good result. Your exact process will depend on the ingredient and equipment, but these five steps give you a good starting point.
Choose an oil press that can handle the ingredient you want to use. Electric presses are convenient for frequent use, but you can also consider hand-crank models if you don’t want to rely on electricity. Check the machine’s specifications before buying because not every press can handle every crop.
You can press oil from ingredients such as sunflower seeds, sesame seeds, peanuts, flax seeds, walnuts, hazelnuts, almonds, coconut and olives. However, olives usually require specialized equipment. Also, make sure to buy ingredients intended for human consumption rather than birdseed, which isn’t necessarily produced or stored to food-safety standards.
Prepare your seeds or nuts according to your press’s instructions. Remove stones, sticks and other debris, and break up particularly large ingredients if necessary. Some nuts may also need their shells or hulls removed. It’s also important to pay attention to moisture. Material that’s too wet may prevent the oil from flowing properly, but excessively dry ingredients can cause some machines to clog.
Once your ingredients are ready, set your press on a stable surface and place a clean container underneath the oil outlet. A glass jar works well for a small batch and makes it easy to see how much oil you’ve collected. Depending on your machine, you may need to warm it before adding the ingredients. Some presses are designed specifically for cold extraction, but others offer hot pressing. If you’re aiming for cold-pressed oil, use the appropriate setting.
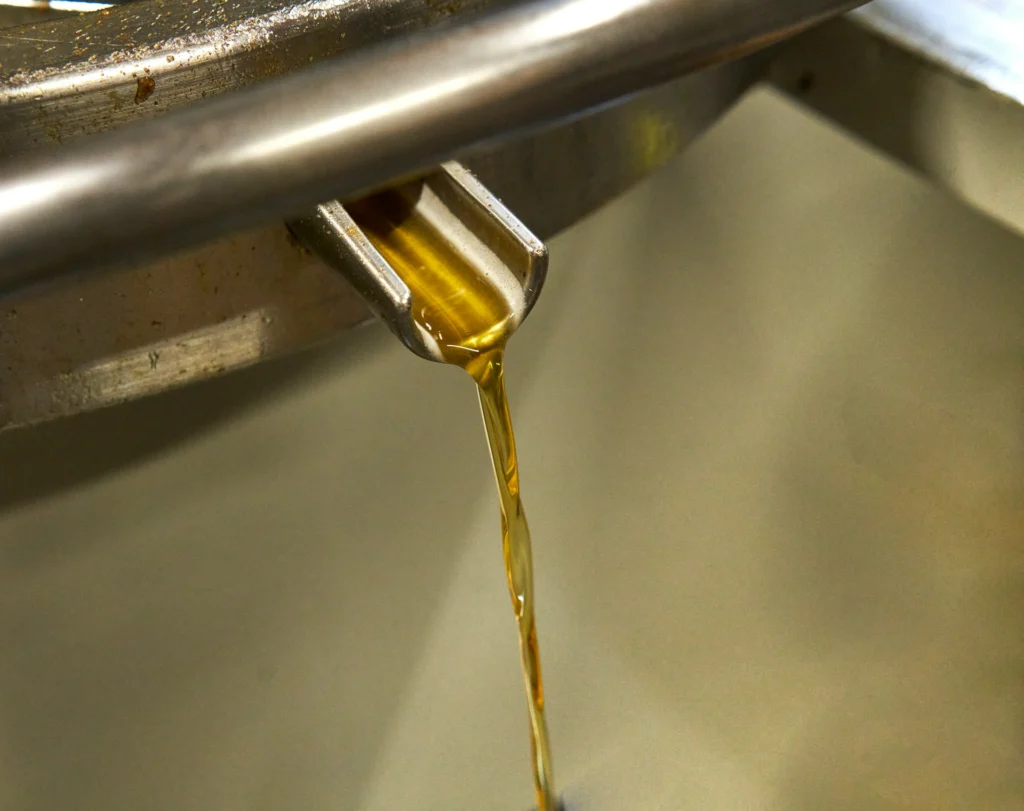
Add your prepared ingredients to the hopper and let the machine gradually crush and press them. If you’re using sunflower seeds, for example, some presses can process them without first removing the hulls.
As the ingredients move through the machine, the oil will drip into your container while the remaining solids emerge separately. The yield varies by ingredient and equipment, so don’t be discouraged if your first batch produces less oil than expected. The leftover solids, known as seed cake, can potentially be composted or repurposed.
Your freshly pressed oil may look cloudy or contain tiny particles. That’s normal for minimally processed oil and doesn’t mean you’ve done anything wrong. Leave the oil undisturbed for roughly five to seven hours. Heavier particles should settle at the bottom, so you can carefully pour the clearer oil into a clean container. Keep the sediment behind, and don’t tip the entire contents into your storage jar.
If you’d rather have a cleaner-looking oil, you can pass it through a fine, food-safe mesh or filter. Don’t expect the result to look exactly like refined supermarket oil, though. Homemade oil undergoes far less processing, so some variation in appearance is part of the deal.
After you pour your finished oil into a clean, airtight container, keep it in a cool, dark place, away from direct sunlight and heat. Smaller batches are a sensible choice because homemade oil can be more susceptible to oxidation than heavily processed commercial oils. Some delicate nut and seed oils may also benefit from refrigeration. Before using the oil, check for an unpleasant smell, stale flavor or other obvious changes that could indicate rancidity.
Don’t forget to clean the machine once you’re done. This is crucial so leftover oil and seed material don’t become rancid and spoil your next batch.
Making vegetable oil at home isn’t quite as effortless as grabbing a bottle from the supermarket, and that’s part of the fun. You get to choose the ingredient, see exactly how the oil is extracted and decide how you want to use the finished product.

Your email address will only be used to send you our newsletter, and at any time you may unsubscribe. For more information, see our Privacy Policy.
